Most of you may know about the Brinell hardness test, but have you ever heard about the Vickers Hardness test? This hardness test is use for the determination of the hardness of the material and its uniqueness is that in this test you have to use the diamond as an indenter.
History
Robert L. Smith and George E. Sandland developed the Vickers hardness test in 1921 at the Vickers Ltd. They found this technique as they desired to have more simple technique than the Brinell hardness test for measuring the hardness of the material. The best part of the Vickers hardness test is that this test is applicable to all the metals that exist in the universe. This test is expressed in the units of the Vickers Pyramid Number (HV) or Diamond Pyramid Hardness (DPH).
The Choice of the Indenter in the Vickers Hardness Test:
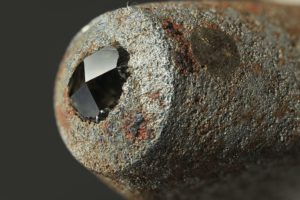
In this test, the indenter plays an important role. During the early days, there was a lot of things were going on about choosing the indenter. But after many tests, the diamond is taken as the indenter in this test. Well, but there is also a restriction on the shape of the diamond. Curious to know this restriction? The diamond must be in the shape of the Square-Pyramid. If you compare the sizes of the indenter used in the Brinell and Vickers hardness test then, the size of the indenter in this test is 3/8 th of the ball diameter used in the Brinell hardness test.
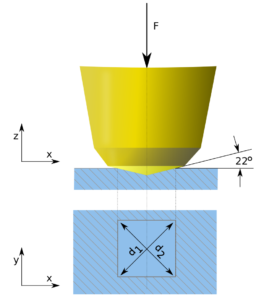
The angle between the flat surface and the inclined outward face of the diamond is kept around 22º.
The force is applied on the diamond in the vertical direction. Now, the Vickers Pyramid number or the HV number is calculated as the ratio of the F/A.
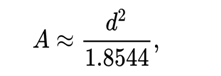
A is the surface area of the resulting indentation. Now, this equation is modified as given below:
d= average length of the diagonal left by the indenter
Now, let us calculate the Vickers Pyramid number by diving the applied force by the indentation area.
This Vickers Pyramid number is given as below:
As shown in the above equation, the unit of the Vickers Pyramid numbers is expressed in the kgf/mm2. Vickers hardness is expressed in the SI units as the MPa or GPa.
If you wanted to convert this kgf/mm2 into N/mm2 then, simply multiply the first unit by the acceleration due to gravity.
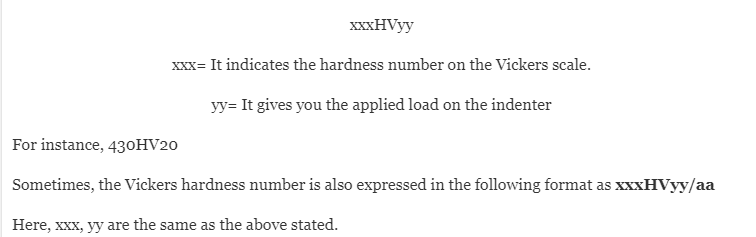
Vickers hardness number is expressed in the following format:
The term aa gives you an idea about the time interval for which the load was applied.
For example, 430HV30/15
Here, 15 indicates that the load is applied to the indenter for 15 seconds.
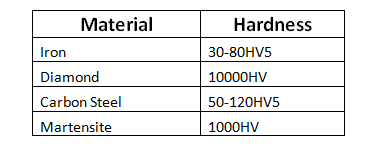
Following is the table that gives you the value of the samples of the HV number for different materials.
For better understanding about the test watch the video given below:
Application of Vickers Hardness Test
Important Application of the Vickers Hardness Test:
Do you know the aircraft Convair 580? In this aircraft, manufacturers specified sleeves as well as fin attachment pins were specified by the Vickers hardness test as 390HV5.
While measuring the hardness with the Vickers test there are restrictions on the nature of the surface of the given material.
The surface of the material should satisfy below conditions:
The given material must be free from any kind of impurities as well as the surface area should be polished or maybe precision ground.
During the experiment of this test, the material or the surface should be tightly clamped in order to get the exact values of the hardness.
Advantages
The main benefit of the Vickers Hardness test is that it is applicable for any type of material. Whether the given material is hard or it is soft, this test is applicable
This test is very versatile because it requires only one type of indenter. So, no need to find various size indenters for complicated applications. You can stick to the ideal indenter and can get the results that you wanted.
This test gives us the highest degree of accuracy so, no need to worry about the hardness values.
Disadvantages
As the above states, this test requires the perfect surface. The surface must be regular.
This test takes 30 to 60 seconds to carry out if all the experimental conditions are identical and set up is ready. This time is larger than other hardness finding tests.
Thus, the Vickers hardness test is very important in the hardness study. Due to the versatility of this test, it has been used in almost every type of application. Though it has some disadvantages, but still it has been largely used overall across the world. In this article, we covered almost every aspect of the Vickers hardness test. If you like this article then, please take the time to share it.